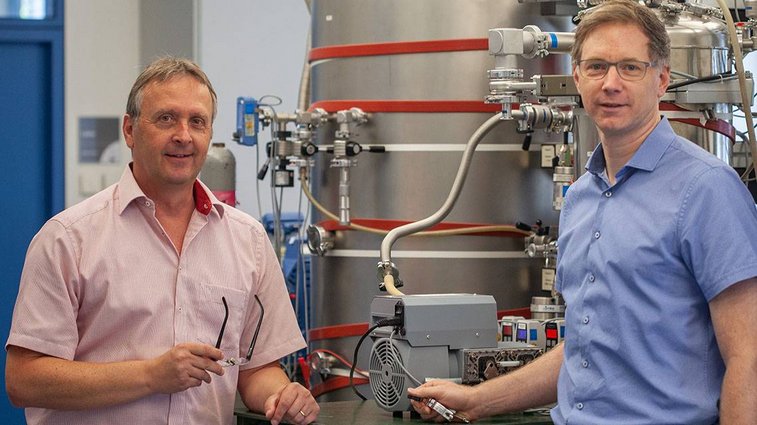
Dr. Jürgen Breitenbach and Thorsten Harter in the vacuum laboratory of VACUUBRAND
VACUUBRAND has been operating an official calibration laboratory for vacuum technology since 1997. It is one of only a few laboratories in Germany to be recognized by the German Accreditation Body (DAkkS). This year our colleagues celebrate the 25th anniversary of our calibration laboratory. We talk to laboratory manager Dr. Jürgen Breitenbach and deputy manager Thorsten Harter.
Dr. Jürgen Breitenbach and Thorsten Harter Dr. Jürgen Breitenbach and Thorsten Harter are both physicists. At VACUUBRAND, they work as head and deputy manager in the DAkkS-accredited calibration laboratory. They check VACUUBRAND and third-party vacuum gauges and issue certified calibration certificates for customers worldwide.
In addition to their work in the DAkkS laboratory, they also carry out tests for product development and record technical data for all VACUUBRAND pumps, gauges and controllers. The aim here is to create the technical documentation – e.g. operating instructions – in accordance with internal and legal requirements. In addition to CE conformity, the measurement data from the vacuum laboratory is also required for country-specific or device-related approvals, such as explosion protection.
What were the beginnings of the calibration laboratory?
Dr. Jürgen Breitenbach: My first task at VACUUBRAND was to build a calibration laboratory for vacuum technology and have it accredited. In addition to setting up a calibration system with a pumping station, this also included, for example, the selection of standards and the creation of a measurement uncertainty balance. I remember it all happened quite quickly at that time: I started at VACUUBRAND in the summer and by Christmas the entire laboratory was up and running. In the spring of 1997, we received our first accreditation. This was still done by the German Calibration Service DKD. Today we are accredited by the German Accreditation Body DAkkS, which has replaced the DKD.
Thorsten Harter: I joined five years later. Jürgen then trained me in the activities and processes in the calibration laboratory. Today, we share the daily tasks that arise. In addition to the work in the DAkkS calibration laboratory this also includes a combination of test support in the internal vacuum laboratory and technical documentation.
Accredited calibration laboratory at VACUUBRAND
• First accreditation in 1997
• Current accreditation according to DIN EN ISO/IEC 17025:2018
• International calibration service for vacuum technology
• Measuring range from 10-3 mbar to 1300 mbar
What were the reasons for an accredited calibration laboratory at VACUUBRAND?

VACUUBRAND also calibrates its own vacuum gauges in the DAkkS laboratory.
Dr. Jürgen Breitenbach: As a manufacturer of measuring instruments, it is of course necessary to calibrate your own instruments. Although this can also be done in a normal factory laboratory, it does not offer the same quality as an officially certified calibration laboratory. So VACUUBRAND has decided to set up an accredited laboratory. This is regularly audited by external experts. A great advantage of this is that we can also transparently demonstrate our competence and quality to customers.
Thorsten Harter: In addition, we can issue internationally recognized calibration certificates for third parties as a service. The best prerequisites for this are our high-quality standards and measuring equipment as well as skilled personnel. We are metrologically positioned directly below the highest body for metrology – the Physikalisch-Technische Bundesanstalt (PTB). With our accredited test laboratory, we fully meet the requirement to calibrate vacuum equipment in a traceable manner. Traceability means that our measurement results are related to national reference standards through an unbroken chain of comparison measurements.
What has changed over the years?
Dr. Jürgen Breitenbach: The need for documented and traceable calibrations has definitely grown. In the past, this was only a small part of our work. Today, we have much more day-to-day business in the DAkkS laboratory. It is interesting that we calibrate a lot of different measuring instruments. In total, we calibrate almost 100 different instrument models. We therefore have a good overview of the vacuum gauges available on the market.
Thorsten Harter: Over the years, the requirements on the competence of calibration laboratories have also increased through new release of new standards. For example, we recently prepared documentation on training records and training plans for staff qualifications. At the same time, we have had the same employees for 20 years, who have a wealth of experience. Nevertheless, it is of course an important and necessary measure for the future.
How important is the calibration service today?
Dr. Jürgen Breitenbach: We continue to observe an increasing demand for our service. Many customers from Germany, Europe as well as other continents entrust us with their vacuum gauges. Since the foundation of the calibration laboratory, calibrations have increased continuously. Last year alone, orders rose by 25%.
Thorsten Harter: Despite the many inquiries, we are still somewhat unique. There are currently "only" four accredited calibration laboratories for vacuum technology in Germany. However, we are well positioned compared to other countries. That is why we support not only national but also international customers. Our calibration service helps them to meet the requirements of quality management or test equipment monitoring in the best possible way.
What is the process of a DAkkS calibration?
During a calibration, we compare the displayed measured values of a vacuum gauge with the true reference value. This includes the documentation of measurement deviations (measurement accuracy), calculation of the measurement uncertainty (range within which the true measured value is located with a defined probability) and the creation of an official, internationally valid calibration certificate. This process usually takes several days:
First, a condition and function check of the delivered vacuum gauge is performed and the calibration capability is confirmed. Then we usually evacuate the device overnight and perform an input calibration the next day. Reasons for any measurement deviations of the device can be, for example, chemical substances, aging, contamination or shock. If the observed measurement deviations can be improved by an adjustment, we perform it and recalibrate the instrument in this delivery condition. Finally, we create the official DAkkS calibration certificate and send it back to the customer together with the vacuum gauge.
